Monstera care in winter: 8 tips for the cold months
Winter is a challenging period for your Monstera. Less light, dry heating air, and lower temperatures — it's the exact opposite of the tropical conditions this Swiss cheese plant loves. With these 8 winter care tips, you'll ensure your Monstera gets through the cold months successfully.
Winter vs. Summer Monstera Care
Aspect
Summer
Winter
Water
1x per week
1x per 10-14 days
Nutrients
1x per month
No nutrients
Light
Indirect, out of direct sun
Closer to the window
Misting
Occasionally
Recommended daily
Temperature
20-25°C
Minimum 15°C, away from drafts
Growth
Active
Rest period, minimal growth
Tip 1: Water less
In winter, your Monstera hardly grows and evaporates less water. Therefore, give half the amount of water as in summer. Wait until the top 5 cm of potting soil is completely dry. Overwatering in winter is the number one cause of root rot.
Tip 2: Increase humidity
Heated air is bone dry — sometimes only 30-40% humidity, while your Monstera prefers 60-80%. Mist the leaves daily, group plants together (they create a microclimate), or place a humidifier in the room.
Tip 3: Move closer to the window
The winter sun in the Netherlands is weak enough not to burn your Monstera. Feel free to place it closer to the window than in summer. More light means healthier leaves, even during the darker months.
Tip 4: Do not fertilize
Stop fertilizing from October through February. Your Monstera is in a dormant phase and cannot absorb nutrients. Fertilizing in winter can even lead to a buildup of salts in the potting soil, which damages the roots.
Tip 5: Keep away from drafts
Cold drafts are detrimental to tropical plants. Do not place your Monstera next to an open window, exterior door, or ventilation grille. The cold from a single-pane window can also be harmful — keep at least 10 cm distance.
Tip 6: Do not repot in winter
Wait until spring to repot. During the winter months, your Monstera does not have enough energy to form new roots in fresh potting soil. Repotting in winter increases the risk of root rot.
Tip 7: Keep leaves clean
Dust accumulates in winter (dry air, closed windows). Wipe the leaves with a damp cloth once every two weeks. Clean leaves absorb more light — and your plant desperately needs that in winter.
Tip 8: Accept less growth
A Monstera that doesn't grow in winter is not a sick Monstera — it's a plant in a dormant phase. Do not try to force growth with extra nutrients or water. As the days get longer in March, you'll see new leaves emerge again.
🌿 View our Monstera collection
At XXLplant, you'll find the most beautiful and largest Monsteras, directly from the grower.
At temperatures below 10°C, Monstera leaves can be damaged. Below 5°C, the plant can be severely damaged or die. Always keep it above 15°C.
Should I provide supplementary lighting for my Monstera in winter?
It's not strictly necessary, but a grow light can help if your Monstera is in a very dark spot. Turn the lamp on for 10-12 hours a day to compensate for the lack of daylight.
Repotting is an essential part of plant care.
In this guide, we will teach you step-by-step how to correctly repot Dracaena.
When to Repot?
Your Dracaena should be repotted if:
Roots are growing out of the drainage hole
The plant dries out faster than usual
The plant stops growing despite good light
Roots are visible on the soil surface
The growing season has begun (spring)
Generally, strong growers like Dracaena should be repotted every 2 years.
Avoid repotting in winter when growth is slow.
What You Need
Gather these items before you start:
A new pot, 1-2 sizes larger than the current one (a few millimeters larger in diameter is better than much larger)
Fresh potting mix suitable for Dracaena
Mesh or screens for the drainage hole (optional)
A trowel or spoon
Water
Old newspapers or a mat to work on
Potting Soil Type: Use a well-draining soil mix.
For Dracaena, standard potting mixes work well,
though you can add some perlite or orchid bark for better drainage.
Step-by-Step Repotting
Step 1: Preparation - Lightly water the plant so the soil is not completely dry, but not soaking wet either.
This makes it much easier to remove the plant from the pot.
Step 2: Removing the Plant from the Pot - Tilt the pot sideways and carefully slide the plant out.
If the plant is stuck, you can gently break the old pot or run a knife along the inner edges.
Step 3: Examining the Roots - Inspect the roots.
Healthy roots are white or light-colored.
If you see black, slimy roots, there is root rot, and you should remove all rotted parts.
Step 4: Removing Old Soil - Gently massage the roots to loosen some old soil.
This promotes new root growth in the new soil.
Don't remove everything - about 50% of the old soil can remain.
Step 5: Placing the Plant in the New Pot - Put a layer of new soil in the bottom of the new pot.
Place the plant so it sits at the same depth as before.
Fill around with soil and gently press down.
Step 6: Watering - Gently water until it drains out of the drainage hole.
This helps settle the soil and properly position the roots.
Step 7: Resting - Place the plant in its permanent spot and water minimally for 1-2 weeks
while it adjusts to the new soil.
Correct Potting Soil
Dracaena is not very picky about potting soil but prefers well-draining mixes:
40% standard houseplant soil
30% perlite or vermiculite
20% orchid bark or charcoal
10% sand
Alternatively, you can buy a ready-made "aroid mix" or "well-draining houseplant mix."
The most important thing is that water drains well, but the plant does not dry out too quickly.
Care After Repotting
The first few weeks after repotting are crucial:
Water moderately - do not fertilize until you see new growth
Do not place in direct sunlight for several days
Avoid moving and temperature fluctuations
Fertilize only after 4-6 weeks once the plant has adjusted
After a few weeks, you will see Dracaena producing new growth in its new pot.
This indicates that the repotting was successful!
🌿 Check out our Dracaena collection
At XXLplant, you will find the most beautiful and healthiest Dracaena plants,
directly from the best growers. For over 10 years, customers have trusted our quality.
View Dracaena →
Frequently Asked Questions
How often should I repot my Dracaena?
Every 2 years
What is the best potting soil type?
Well-draining potting soil is essential. Add perlite or orchid bark for better drainage.
Can I give my plant a larger pot?
Yes, but no more than 1-2 sizes larger. Too large a pot leads to overwatering.
Your Monstera is growing like crazy, and its roots are peeking out from the bottom of the pot. Time to repot! But how do you do it correctly without damaging your plant? In this guide, we explain step-by-step how to repot your Monstera — including tips for the right pot, potting soil, and aftercare.
Monstera Repotting Checklist
What you need
Details
New pot
2-4 cm larger in diameter, with drainage hole
Potting soil
Aerated mix: 60% potting soil, 20% perlite, 20% coco coir
Drainage
Layer of hydro granules or clay pebbles at the bottom
Moss pole
Optional, for support for larger specimens
Best time
Spring (March-May), beginning of growing season
Frequency
Every 1-2 years
When should you repot your Monstera?
There are a few clear signs that your Monstera needs a larger pot. Roots growing out of the drainage hole, growth slowing down despite proper care, the potting soil drying out extremely quickly after watering, or roots appearing above the soil. The best time to repot is in spring (March to May), when the plant emerges from its winter dormancy and has plenty of energy to form new roots.
Step-by-step: Repotting your Monstera
Step 1: Preparation
Water your Monstera a day in advance. This makes the root ball more flexible and reduces stress. Lay down newspaper or a plastic sheet on your workspace to prevent mess.
Step 2: Remove the plant from its pot
Tilt the pot and gently slide the plant out. Is it stuck? Gently squeeze the sides of a plastic pot, or use a knife to run along the inside of a terracotta pot. Never pull on the stem.
Step 3: Inspect the roots
Examine the root ball. Healthy roots are white to light brown. Remove any rotten (dark, soft) roots with a clean, sharp knife. Are the roots very tangled? Gently loosen them with your fingers.
Step 4: Fill the new pot
Place a layer of hydro granules at the bottom of the new pot for extra drainage. Then add a layer of fresh potting soil. The top of the root ball should ultimately be at the same height as in the old pot.
Step 5: Place the plant
Place the Monstera in the new pot and fill around it with fresh potting soil. Lightly press down the soil, but not too firmly — the roots need air. If necessary, place a moss pole for support for large specimens.
Step 6: Aftercare
Immediately after repotting, give it a good soak of water so that the soil settles around the roots. Do not give plant food for the first 2 weeks and avoid direct sunlight. Your Monstera needs some time to adjust to its new home.
🌿 Need an XXL Monstera? We deliver the largest ones
At XXLplant, you'll find the most beautiful and largest Monsteras, directly from the grower.
View Monsteras →
Frequently Asked Questions
How big should the new pot be?
Choose a pot that is 2 to 4 cm larger in diameter than the current pot. A pot that is too large retains too much moisture, which can cause root rot.
Can I use regular garden soil?
No, regular garden soil is too heavy and retains too much moisture. Use an aerated mix of potting soil with perlite and coco coir for good drainage.
My Monstera is drooping after repotting, is that normal?
Yes, that is normal. The plant is experiencing repotting stress and needs 1-2 weeks to recover. Keep the soil lightly moist and provide indirect light.
Your Monstera has brown or yellow leaves and you want to know what's going on. Recognizable! It's one of the most common concerns among plant lovers. The good news: in most cases, it's easy to solve if you know the cause.
Common Monstera Problems — Causes & Solutions
Problem
Cause
Solution
Brown leaf edges
Too low humidity
Mist or humidifier
Yellow leaves
Too much water or too little light
Water less, more light
Brown spots
Sunburn
Move out of direct sunlight
Drooping leaves
Too little water or root rot
Check roots and watering pattern
No fenestrations
Too young or too little light
Patience + more indirect light
Black spots
Root rot due to overwatering
Repot, remove rotten roots
Drops on leaves
Guttation (normal)
No action needed, it's healthy
Brown leaf edges
Brown, dry edges on your Monstera's leaves almost always indicate too low humidity. Especially in the winter months, when the heating is on, the air dries out quickly. The solution is simple: mist your Monstera regularly, place a bowl of water near the heater, or invest in a humidifier.
Yellow leaves
Yellow leaves can have several causes, but the two most common are overwatering and too little light. First, check if the soil isn't too wet. Does the potting soil still feel moist to the touch? Then you're watering too much. Let the soil dry out thoroughly before watering again.
Is your Monstera in a dark spot? Then move it closer to the window. A plant that receives too little light cannot produce chlorophyll properly, causing its leaves to turn yellow.
Brown spots in the middle of the leaf
Brown, dry spots in the middle of the leaves usually indicate sunburn. The Monstera cannot tolerate direct sunlight — the intense midday sun can literally burn the leaf tissue. Move your plant to a spot with indirect light and remove severely damaged leaves.
Limp, drooping leaves
A Monstera with limp leaves is either thirsty or suffering from root rot. Feel the soil: is it bone dry? Then your plant is craving water. Give it a good drink, and within a few hours, the leaves will recover.
Is the soil soaking wet? Then there may be root rot. Take the plant out of the pot, check the roots (healthy roots are white/light brown, rotten roots are dark brown/black and soft), and remove the rotten part. Repot in fresh, well-draining potting soil.
When are yellow leaves normal?
Important to know: if only the lowest, oldest leaves occasionally turn yellow, that is completely normal. The plant sheds old leaves to put energy into new growth. As long as the newest leaves are healthy, you don't need to worry.
🌿 Prefer a fresh, healthy Monstera?
At XXLplant, you'll find the most beautiful and largest Monsteras, directly from the grower.
View Monsteras →
Frequently asked questions
Can I make brown leaves green again?
No, once brown tissue does not recover. Cut away the brown part or remove the entire leaf if it is largely damaged. Focus on preventing new damage.
How do I know if my Monstera is getting too much or too little water?
Check the soil: wet and musty smelling = too much water. Bone dry and pulling away from the pot edge = too little. The ideal situation is slightly moist a few centimeters deep.
Should I remove yellow leaves?
Yes, remove completely yellow leaves. The plant no longer draws energy from them, and they can attract mold.
Is your plant unwell?
Pick your plant and the symptom, and our Plant Doctor gives you an instant free diagnosis with a step-by-step plan.
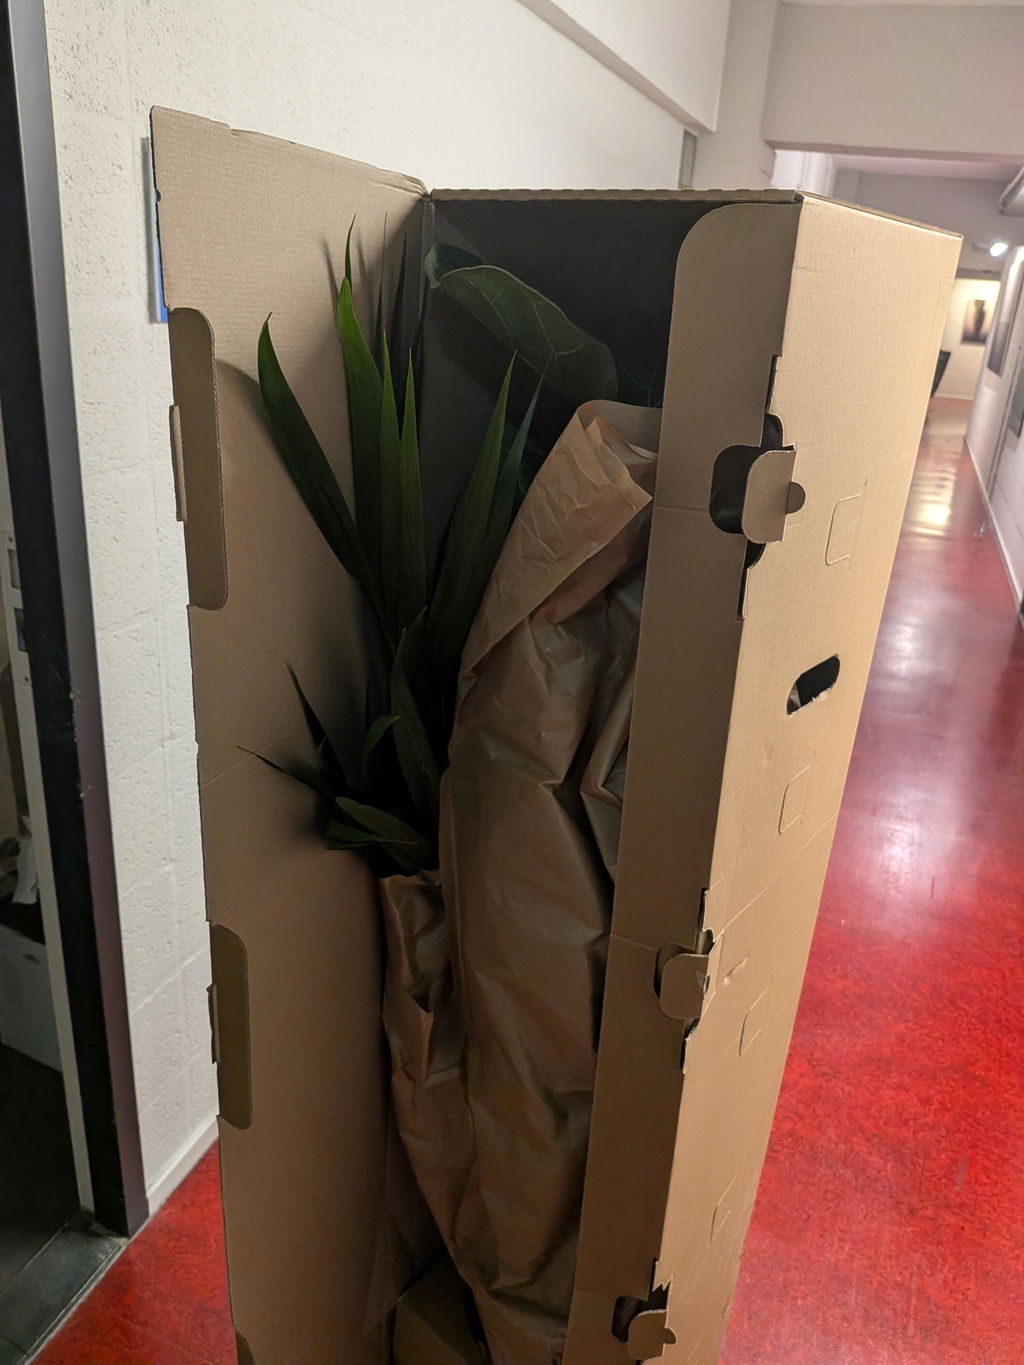
Prachtige bananenplant ontvangen. Groot, frisgroen blad en duidelijk van goede kwaliteit. Hij werd stevig verpakt geleverd en kwam zonder schade aan.
De plant staat hier in op kantoor en geeft meteen veel sfeer. Verzorging is tot nu toe eenvoudig en hij oogt erg gezond. Zeer tevreden over de kwaliteit en service. Zeker een aanrader om hier te bestellen. Ik had 3 planten tegelijk besteld - alle 3 waren ze top.
De Ficus Lyrata is precies zoals verwacht. Mooie volle plant, gezond blad en netjes op hoogte. Hij kwam goed verpakt binnen en had geen beschadigingen.
Staat hier nu een paar weken op kantoor en doet het uitstekend. Duidelijke verzorging, geen gedoe. Prijs-kwaliteit klopt en de levering was snel. Ik zou hier zeker opnieuw bestellen.
Prachtige Kentia palm echt een goed website om planten te kopen!
Prachtige palm. Volle bladeren. 15cm hoger dan aangegeven (altijd goed). Geen dode punten, mooi groen. Werd geleverd in een op maat gemaakte kartonnendoos. Erg stevig - blij mee!